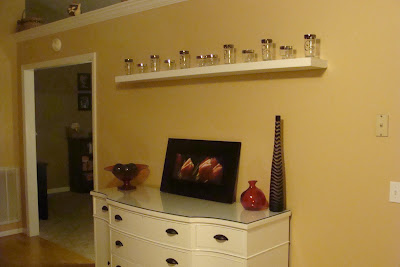
A couple of months ago, I was on my favorite home decor blog - www.younghouselove.com. They were featuring another blogger who basically can make furniture look exactly like furniture you can buy in a store, and she posts plans on her website. Her blog is www.knock-offwood.com and on there you can find plans to build so many awesome things. This was our first project, but I'm hoping to talk the hubby into a couple more down the road.
Our goal was to end up with shelves that look like these from Ikea

Here are what Ana's (the plan maker and blogger) shelves look like in her house

We knew we weren't professional woodworkers, so ours were probably going to look a little more "home made" than Ana's, but it was worth a shot. On Friday evening we went out to Lowe's and bought all the supplies, only spending about $30. Just to put it into perspective, we got the supplies to make 2 shelves, and one shelf costs $30 from Ikea. So we were definitely saving some money in the long run.
Friday evening when we got home, Jonathan cut the wood so we would only have to put them together, sand them, prime and paint them on Saturday.

Saturday morning we started putting together the frames and sleeves and doing all the sanding, priming and painting.

Once I was into painting, I realized we weren't going to have enough paint in the garage to paint both with 2 coats of white paint, so we have only hung one of the shelves so far. The other one is waiting for one more coat of paint, then we're planning to hang it in our master bathroom above the bathtub for some nice storage.
The finished one we hung in the kitchen above the new buffet sideboard. I was thinking we would put both above there for even more storage, but if we had done that, I couldn't have reached the top shelf, so we decided to just hang one there. Here's a close up before I accessorized it.

So now the question...what to put on it? Well I had multiple options, but my favorite idea for now are some vintage glasses passed down from Jonathan's great Aunt. They are super cool and have etched "C"s on them, and I have been wanting to display them somewhere. This seemed like the perfect place!


So there you have it...a quick run down of our little weekend project. If you're interested in making the shelves yourself, you can find the plans here


